基于lobe的垃圾分类(图像分类)
基于lobe的垃圾分类模型
Lobe 是一款免费且易于使用的 Microsoft 桌面应用程序,可让您构建、管理和使用自定义机器学习模型。 使用 Lobe,您可以创建一个图像分类模型,将图像分类为代表其内容的 标签。 您可以直接将 Lobe 模型上载到 AI Builder,以与 Power Apps 和 Power Automate 一起使用。
导入数据集
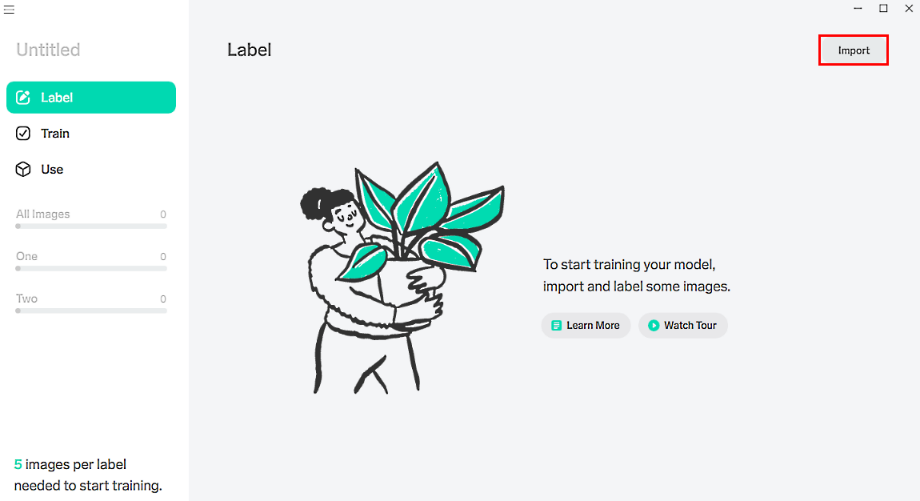
在 Lobe 内,通过选择 导入 来创建新项目。

导入和标记图像,然后训练分类模型。 要了解如何执行此操作,请转到 Lobe 帮助网站。
(可选)观看 Lobe 主页上的视频,浏览 Lobe 并更好地了解图像分类。
模型框架选择
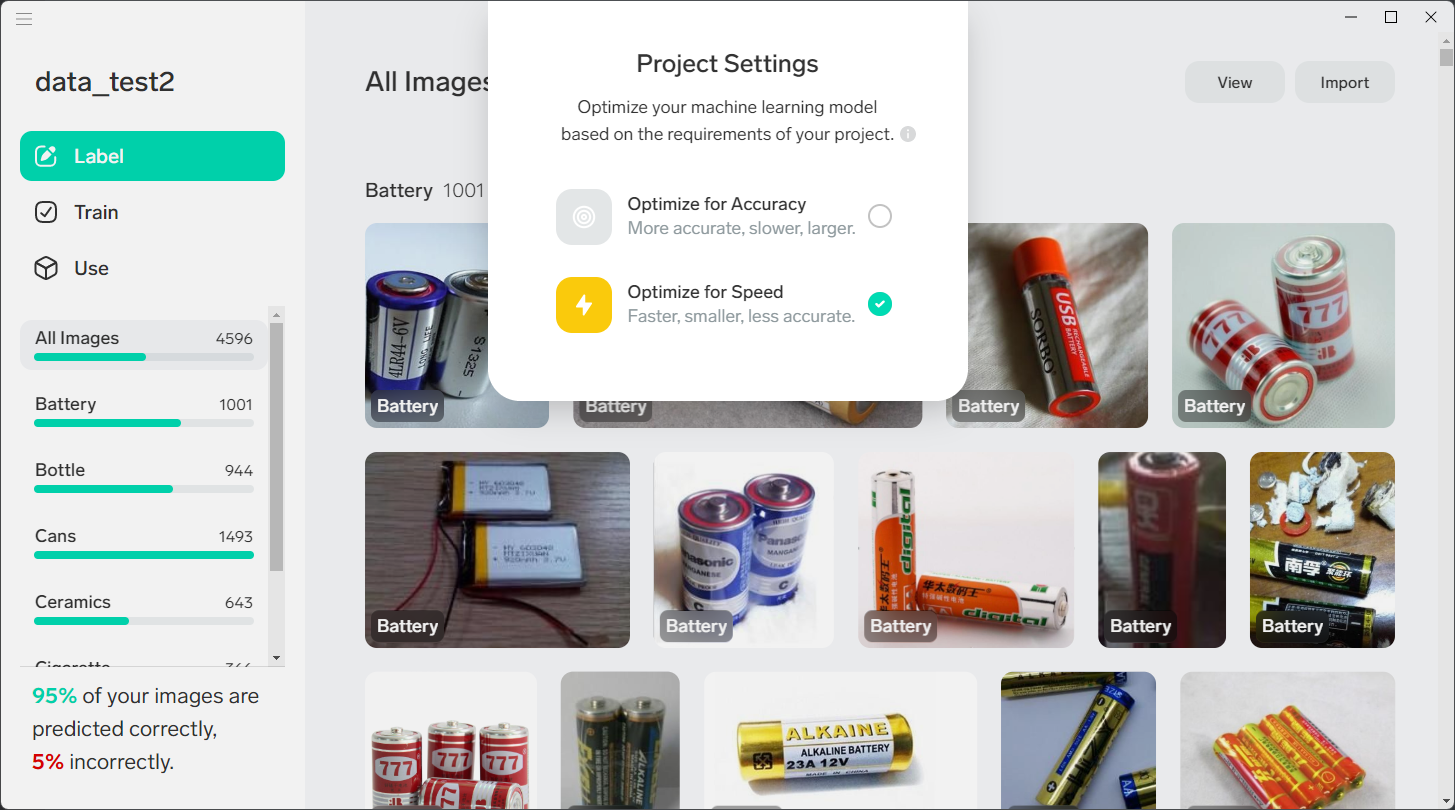
Lobe 提供了两种项目最佳模型体系结构,可以选择更改。 更改项目将重置所有已完成的训练并自动训练新模型。
速度: 将此设置用作需要快速响应时间的应用或流的默认设置。
准确度: 将此设置用于需要批处理作业或要求处理速度更慢的应用或流。

导出模型
这里我们为了方便部署以及加速模型的推导选择以ONNX模型导出。

基于ONNX实时预测
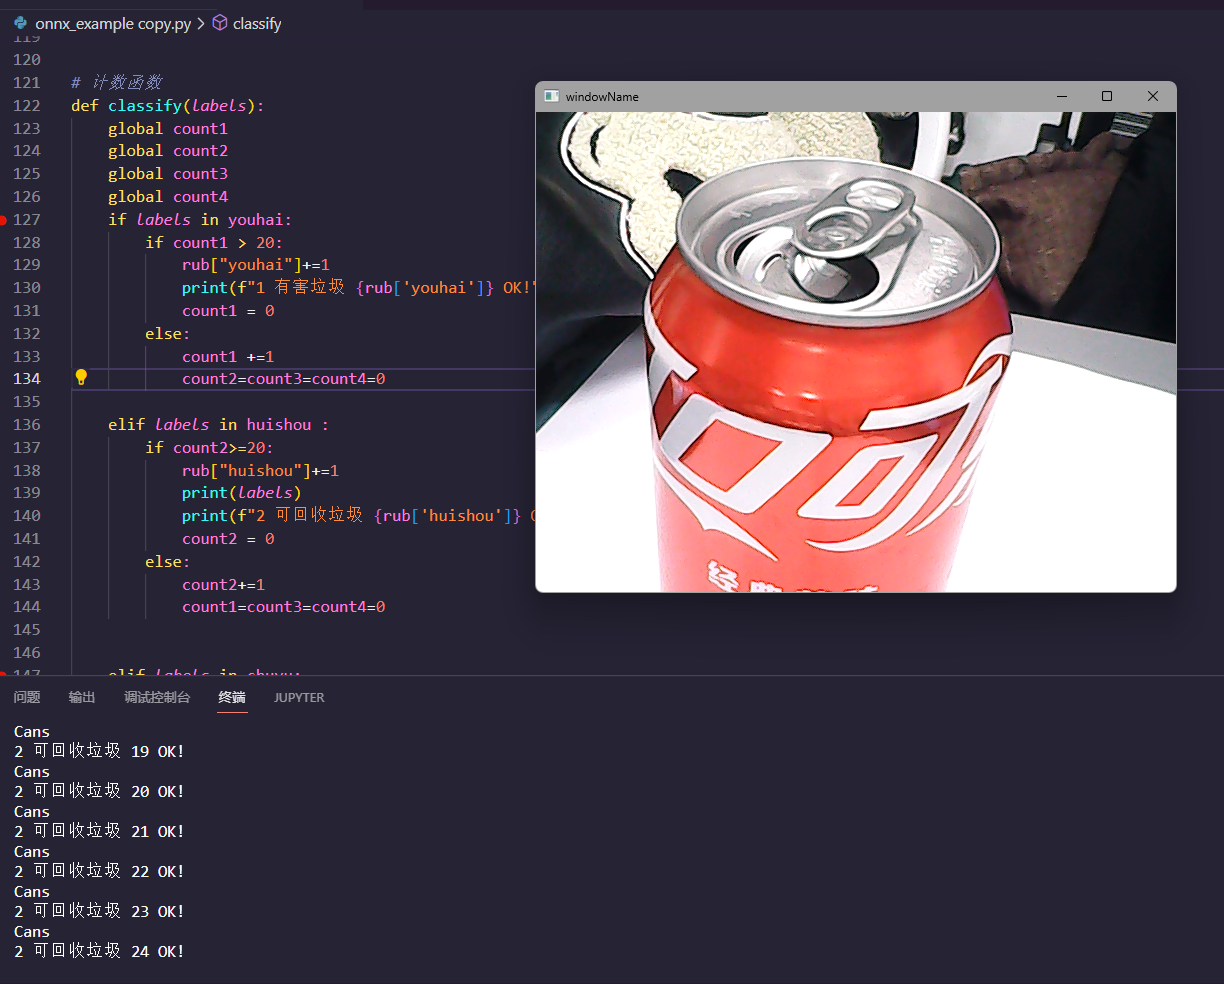
我们的目标是使用opencv对摄像头采集的帧进行实时检测,这时我们就需要对模型以及图片进行相关的预处理。
导入相关库
import json
import os
from time import sleep
import cv2
import numpy as np
import onnxruntime as rt
from PIL import Image数据初始化
EXPORT_MODEL_VERSION = 1
count1 = 0 # 有害垃圾计数器
count2 = 0 # 可回收垃圾计数器
count3 = 0 # 厨余垃圾计数器
count4 = 0 # 其他垃圾计数器
# 创建四种垃圾的分类用于储存数据
rub = {
"youhai":0,
"huishou":0,
"chuyu":0,
"qita":0
}
# 细分四种垃圾分类
youhai = ["Battery"]
huishou = ["Bottle","Cans"]
chuyu = ["Vegetables"]
qita = ["Ceramics"]创建ONNXModel类
class ONNXModel:
def __init__(self, dir_path) -> None:
"""获取模型文件名的方法"""
model_dir = dir_path
# 打开signature.json
with open(os.path.join(model_dir, "signature.json"), "r") as f:
self.signature = json.load(f)
self.model_file = os.path.join(model_dir, self.signature.get("filename"))
# 判断模型文件是否存在
if not os.path.isfile(self.model_file):
raise FileNotFoundError(f"Model file does not exist")
# 获取模型输入和输出的签名
self.signature_inputs = self.signature.get("inputs")
self.signature_outputs = self.signature.get("outputs")
self.session = None
if "Image" not in self.signature_inputs:
raise ValueError(
"ONNX model doesn't have 'Image' input! Check signature.json, and please report issue to Lobe.")
# 在签名文件中查找版本。
# 如果未找到或与预期不匹配,打印消息
version = self.signature.get("export_model_version")
if version is None or version != EXPORT_MODEL_VERSION:
print(
f"There has been a change to the model format. Please use a model with a signature 'export_model_version' that matches {EXPORT_MODEL_VERSION}."
)
def load(self) -> None:
"""将模型从路径加载到模型文件"""
# 将 ONNX 模型加载为session.
self.session = rt.InferenceSession(path_or_bytes=self.model_file)
def predict(self, image: Image.Image):
"""
用ONNX模型预测session!
"""
# 处理图像以与模型兼容
img = self.process_image(image, self.signature_inputs.get("Image").get("shape"))
# run the model!
fetches = [(key, value.get("name")) for key, value in self.signature_outputs.items()]
# make the image a batch of 1
feed = {self.signature_inputs.get("Image").get("name"): [img]}
outputs = self.session.run(output_names=[name for (_, name) in fetches], input_feed=feed)
return self.process_output(fetches, outputs)
def process_image(self, image: Image.Image, input_shape: list) -> np.ndarray:
"""
给定 PIL 图像,将正方形中心裁剪并调整大小以适合预期的模型输入,并从 [0,255] 转换为 [0,1] 值。
"""
width, height = image.size
# 确保图像类型与模型兼容,如果不匹配,则进行转换
if image.mode != "RGB":
image = image.convert("RGB")
# 居中裁剪图像(可以替换任何其他方法来制作方形图像,例如仅调整大小或用 0 填充边缘)
if width != height:
square_size = min(width, height)
left = (width - square_size) / 2
top = (height - square_size) / 2
right = (width + square_size) / 2
bottom = (height + square_size) / 2
# 裁剪图像的中心
image = image.crop((left, top, right, bottom))
# 现在图像是正方形的,将其大小调整为模型输入的正确形状
input_width, input_height = input_shape[1:3]
if image.width != input_width or image.height != input_height:
image = image.resize((input_width, input_height))
# 使 0-1 浮点数而不是 0-255 int(默认情况下加载 PIL 图像)
image = np.asarray(image) / 255.0
# 按照模型预期设置输入格式
return image.astype(np.float32)
def process_output(self, fetches: dict, outputs: dict) :
# 取消批处理,因为我们运行了一个批量大小为 1 的图像,
# 使用 tolist() 转换为普通的 python 类型,并使用 .decode() 将任何字节字符串转换为普通字符串
out_keys = ["label", "confidence"]
results = {}
for i, (key, _) in enumerate(fetches):
val = outputs[i].tolist()[0]
if isinstance(val, bytes):
val = val.decode()
results[key] = val
confs = results["Confidences"]
labels = self.signature.get("classes").get("Label")
# 取出概率最大的值
max_confs = max(confs)
# 取出概率最大值对应的索引
id_max = confs.index(max_confs)
result = labels[id_max] + " : " + str(max_confs)
return labels[id_max],max_confs,result创建计数函数
def classify(labels):
global count1,count2,count3,coun
if labels in youhai:
if count1 > 20:
rub["youhai"]+=1
print(f"1 有害垃圾 {rub['youhai']} OK!")
count1 = 0
else:
count1 +=1
count2=count3=count4=0
elif labels in huishou :
if count2>=20:
rub["huishou"]+=1
print(f"2 可回收垃圾 {rub['huishou']} OK!")
count2 = 0
else:
count2+=1
count1=count3=count4=0
elif labels in chuyu:
if count3>=20:
rub["chuyu"]+=1
print(f"3 厨余垃圾 {rub['chuyu']} OK!")
count3=0
else:
count3+=1
count1=count2=count4=0
else:
if count4>=20:
rub["qita"]+=1
print(f"4 其他垃圾 {rub['qita']} OK!")
count4=0
else:
count4+=1
count1=count2=count3=0
识别程序
def main():
dir_path = os.getcwd()
model = ONNXModel(dir_path=dir_path)
model.load()
cap = cv2.VideoCapture(0)
while True:
ret, frame = cap.read()
cv2.imshow('windowName', frame)
# frame = cv2.imread(r"F:\USUALLY\rubbish ONNX\example\1.jpg")
img = Image.fromarray(frame, "RGB")
# image = Image.open(img0)
outputs,conf,res = model.predict(img)
if conf>=0.9:
classify(outputs)
else:
pass
# 点击小写字母q 退出程序
if cv2.waitKey(1) == ord('q'):
break
# 点击窗口关闭按钮退出程序
if cv2.getWindowProperty('windowName', cv2.WND_PROP_AUTOSIZE) < 1:
break
cap.release()
cv2.destroyAllWindows()
if __name__ == "__main__":
main()实时预测结果


本文是原创文章,采用 CC BY-NC-ND 4.0 协议,完整转载请注明来自 zuimiao
评论
匿名评论
隐私政策
你无需删除空行,直接评论以获取最佳展示效果

